Building Mobile Apps with Jenkins and macOS
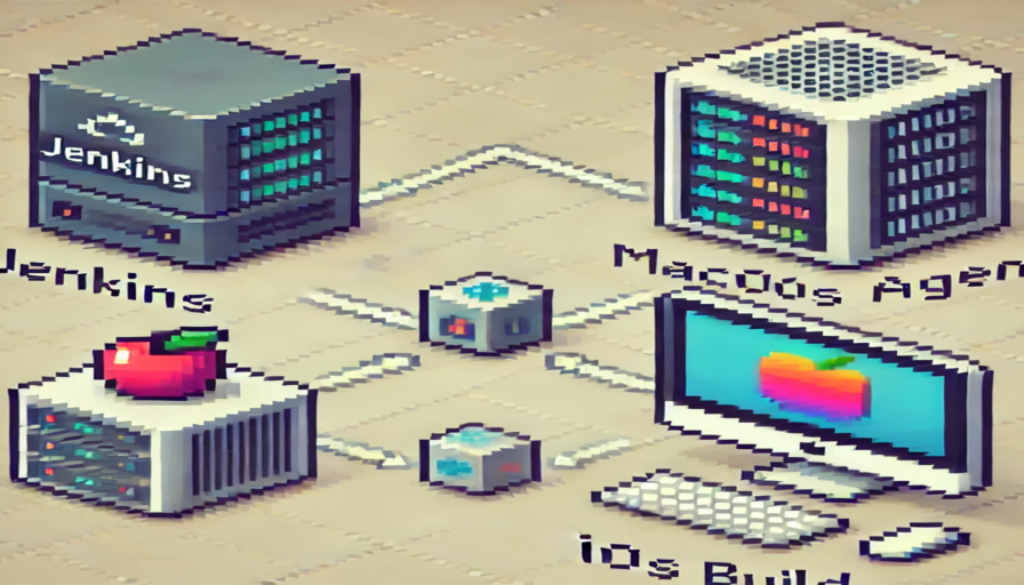
If you’re a mobile app developer, you’ve likely heard of Jenkins—a powerful automation tool that helps streamline your build process. It’s widely used for continuous integration (CI) and continuous delivery (CD) in all sorts of development environments. But if you’re building iOS apps, Jenkins alone won’t be enough. Since Apple requires macOS to compile iOS apps, you need a Mac in the equation.
In this post, I’ll guide you through setting up Jenkins to use a macOS machine as an agent for building iPhone apps. This post assumes you already have Jenkins running on your local network, and you can build your app on the Mac you’ll be using. We’ll skip SSH setup and focus on using Jenkins’ inbound agent instead. Let’s dive in!
How to Set Up Jenkins Agent on macOS
Step 1: Create the Jenkins User on Your Mac
The first thing we need is a dedicated user account for Jenkins on your Mac. This keeps things organized and avoids permission issues down the road. Here’s how to create the user:
- Open the terminal on your Mac.
- Run the following command to create a user named
jenkins:
sudo sysadminctl -addUser jenkins -fullName "Jenkins User" -password <a password for jenkins>
sudo dscl . -change /Users/<username> NFSHomeDirectory <old-path> <new-path>
sudo su jenkins
# set your shell
chsh -s /usr/bin/zsh
# setup keychain
mkdir -p /Users/jenkins/Library/Keychains
security create-keychain -p <password> /Users/jenkins/Library/Keychains/Login.keychain.db
security set-keychain-settings -t 3600 -l ${HOME}/Library/Keychains/login.keychain
- Give the new user permission to use all the tools required to build your app. Add the necessary setup to this user’s
.zshrcfile~/.zshrc. There is a whole lot of configuration for the tools you might need for development. (You might check out my other post on setting up a mac for development, much of this file is from that.
export LANG=en_US.UTF-8
export LC_ALL=en_US.UTF-8

# if not already set up on your machine, add basic paths.
# export PATH="/usr/local/bin:/usr/bin:/bin:/usr/sbin:/sbin:$PATH"

# brew
export PATH=/opt/homebrew/bin:/opt/homebrew/sbin:$PATH

# nvm
export NVM_DIR="$HOME/.nvm"
[ -s "/opt/homebrew/opt/nvm/nvm.sh" ] && \. "/opt/homebrew/opt/nvm/nvm.sh"  # This loads nvm
[ -s "/opt/homebrew/opt/nvm/etc/bash_completion.d/nvm" ] && \. "/opt/homebrew/opt/nvm/etc/bash_completion.d/nvm"  # This
 loads nvm bash_completion

# Pyenv
export PYENV_ROOT="$HOME/.pyenv"
export PATH="$PYENV_ROOT/bin:$PATH"
if command -v pyenv 1>/dev/null 2>&1; then
   eval "$(pyenv init -)"
fi

# python virtualenv
if which pyenv-virtualenv-init > /dev/null; then
  eval "$(pyenv virtualenv-init -)";
- Don’t forget to set up the login keychain for Jenkins to access code-signing certificates. To do that, log in as the Jenkins user and open Keychain Access. Make sure it can unlock the login keychain automatically, or If you prefer to not check that box, you can log in each time you connect to the job by adding this to your build process:
security -v unlock-keychain -p "$KEYCHAIN_PASSWORD"
Step 2: Download the Jenkins Agent Jarfile
Now that we have our user, we’ll configure the Jenkins agent on this Mac. We do that by downloading a small .jar file that connects the Mac to the Jenkins server.
- Go to your Jenkins web interface and navigate to Manage Jenkins > Manage Nodes and Clouds.
- Create a new node, name it something like
Mac-Agent, and assign it themac-devlabel. - Once the node is created, you’ll be given a command to run on the Mac, including a URL to the agent
.jarfile. - Download the jarfile to your Mac, ideally in a folder like
/Users/jenkins/agent/. Run:
   mkdir -p /Users/jenkins/agent
   cd /Users/jenkins/agent
   wget http://<jenkins-server>:8080/jnlpJars/agent.jar
Step 2b: Have the agent run all the time as a service.
To have this run all the time, you can create a launchd plist and set the service to run always.
- Create a
plistfile to configure the agent as a service:
sudo nano /Library/LaunchDaemons/org.jenkins.agent.plist
Add the following content to the plist file:
<?xml version="1.0" encoding="UTF-8"?>
<!DOCTYPE plist PUBLIC "-//Apple Computer//DTD PLIST 1.0//EN" "http://www.apple.com/DTDs/PropertyList-1.0.dtd">
<plist version="1.0">
<dict>
    <key>Label</key>
    <string>org.jenkins.agent</string>
    <key>ProgramArguments</key>
    <array>
        <string>/usr/bin/java</string>
        <string>-jar</string>
        <string>/Users/jenkins/agent/agent.jar</string>
        <string>-jnlpUrl</string>
        <string>http://your-jenkins-server/computer/MacAgent/slave-agent.jnlp</string>
        <string>-secret</string>
        <string>@${secret key file}</string>
        <string>-workDir</string>
        <string>/Users/jenkins/agent</string>
    </array>
    <key>RunAtLoad</key>
    <true/>
    <key>KeepAlive</key>
    <true/>
</dict>
</plist>
Adjust the paths to match your setup and fill in the jnlpUrl and secret values. Save the file and you can have the mac run it when it starts.
sudo launchctl load /Library/LaunchDaemons/org.jenkins.agent.plist
Step 3: Configure the Agent to Run as a macOS Node
You’ve got the agent file in place, so now we’ll register the Mac as a Jenkins node.
- Head back to your Jenkins server, and under the Nodes configuration for
Mac-Agent, you’ll see a unique secret for that node. You’ll need this secret to run the agent. - Start the agent on your Mac with the following command:
java -jar /Users/jenkins/agent/agent.jar -jnlpUrl http://<jenkins-server>:8080/computer/Mac-Agent/slave-agent.jnlp -secret <secret> -workDir "/Users/jenkins/agent"
- You should now see the Mac connected as an agent in the Jenkins UI. Congratulations, you now have a mac agent that can build your mobile apps!
Step 4: Set the Node Label for macOS Builds
To ensure your builds run on this macOS agent, we need to assign it a label. I suggest using something like mac-dev to easily identify this agent for macOS development.
- In Jenkins, go to Manage Jenkins > Manage Nodes and Clouds.
- Edit the
Mac-Agentnode and assign it the labelmac-dev.
Building a Test Project
Let’s verify everything is working by creating a test project that runs a simple macOS command on our Jenkins agent.
- Create a new job in Jenkins by navigating to New Item.
- Name the project something like
Mac Test Projectand set it to be a Freestyle project. - Under Restrict where this project can be run, add the label
mac-devto ensure it runs on the Mac agent. - In the Build section, add an Execute Shell step with a basic macOS command like:
security unlock-keychain -p PASSWORD ${HOME}/Library/Keychains/login.keychain

echo "Hello from macOS"
- Save the project and run the build.
If everything is set up correctly, you’ll see the output from the Mac in your Jenkins console log, proving the agent is connected and working properly.
Final Thoughts
While you can easily build iOS apps in the cloud for a fee, there’s something satisfying about running your builds on your own hardware, especially if you’re building your own apps like I do. With this Jenkins setup, you have full control over the build environment, which is invaluable for mobile development. As you maintain your own build toolchain as you build the app, it also maintains your build env. Wonderful!
If you’re just getting started, don’t be discouraged by the complexity of CI systems like Jenkins. Once it’s set up, it’ll save you time and effort in the long run, giving you more freedom to focus on what matters—building your game or app!
Happy coding!
References


